DSL support for WindowsXP.
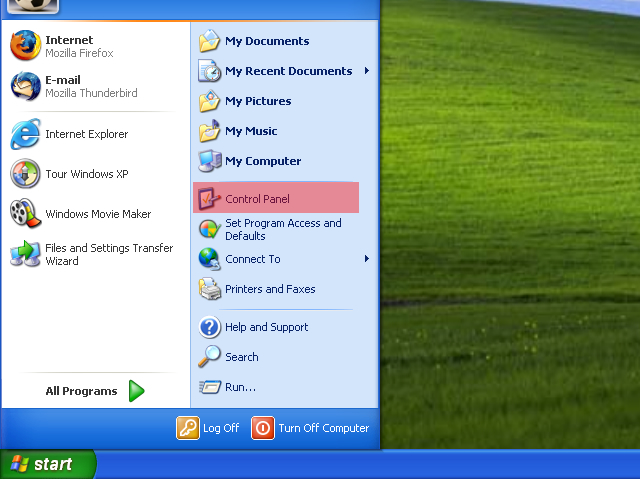
Click on “Start”
![](https://tinyowlstudio.wpenginepowered.com/wp-content/uploads/sites/12/2016/09/dslxpscreen1.jpg)
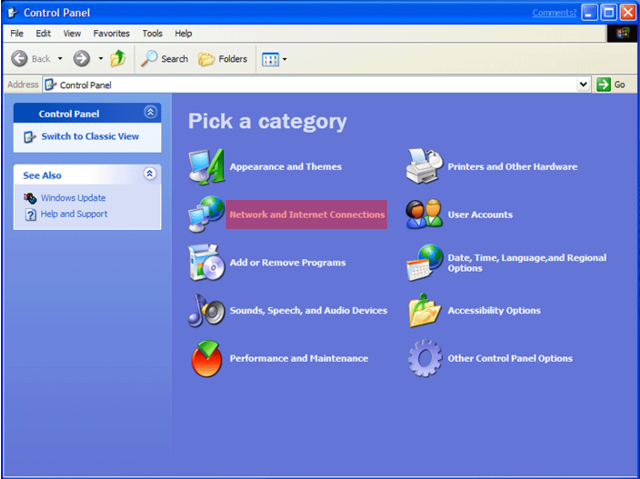
Open “Control Panel”
![](https://tinyowlstudio.wpenginepowered.com/wp-content/uploads/sites/12/2016/09/dslxpscreen2.jpg)
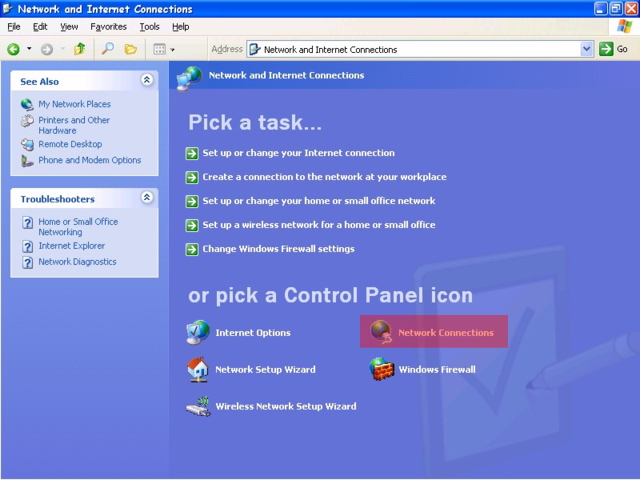
Open “Network and Internet Connections”.
![](https://tinyowlstudio.wpenginepowered.com/wp-content/uploads/sites/12/2016/09/dslxpscreen3.jpg)
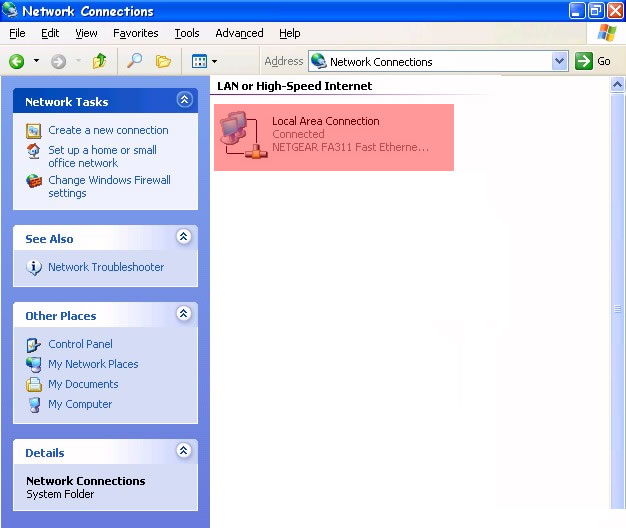
Open “Network Connections”
![](https://tinyowlstudio.wpenginepowered.com/wp-content/uploads/sites/12/2016/09/dslxpscreen4.jpg)
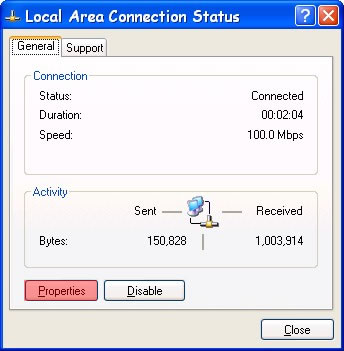
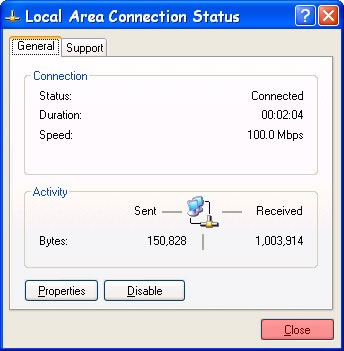
Double Click on “Local Area Connection”
![](https://tinyowlstudio.wpenginepowered.com/wp-content/uploads/sites/12/2016/09/dslxpscreen5.jpg)
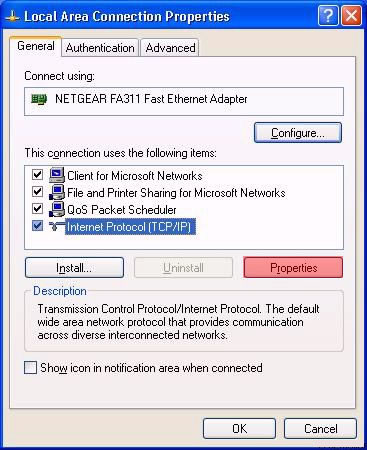
Click on “Properties”
![](https://tinyowlstudio.wpenginepowered.com/wp-content/uploads/sites/12/2016/09/dslxpscreen6.jpg)
Select “Internet Protocal TCP/IP” and click “Properties”
![](https://tinyowlstudio.wpenginepowered.com/wp-content/uploads/sites/12/2016/09/dslxpscreen7.jpg)
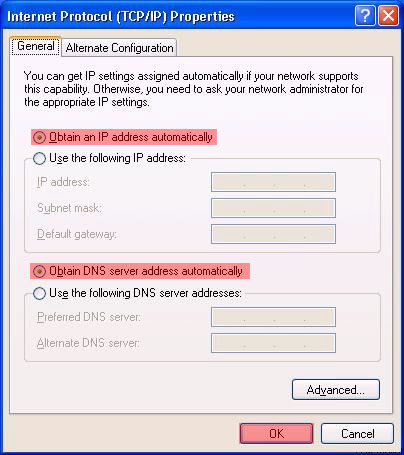
Make sure IP and DNS are both set to “Obtain Automatically” and click “OK”.
![](https://tinyowlstudio.wpenginepowered.com/wp-content/uploads/sites/12/2016/09/dslxpscreen8.jpg)
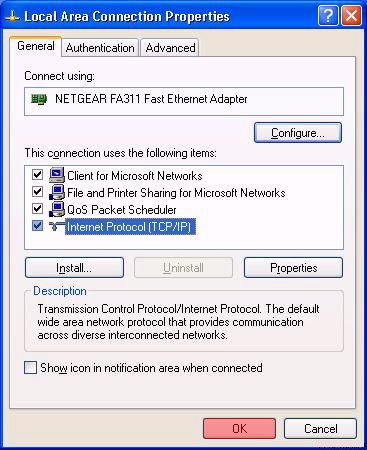
Click “OK” on the “Local Area Connection Properties”.
![](https://tinyowlstudio.wpenginepowered.com/wp-content/uploads/sites/12/2016/09/dslxpscreen9.jpg)
Click “Close” on the “Local Area Connection Status” window.
![](https://tinyowlstudio.wpenginepowered.com/wp-content/uploads/sites/12/2016/09/dslxpscreen10.jpg)
The settings are now correct. You do not have to reboot your computer.
Don't Be Shy
If we didn't answer all of your questions, feel free to drop us a line anytime.
LISCO
58 E. Burlington Ave.
Fairfield, IA 52556
800-331-8414
641-472-5400
custserv@liscocorp.com
Don't Be Shy
If we didn't answer all of your questions, feel free to drop us a line anytime.